Did you know you can broadcast your cool drone shots live to the world? If you are all over that already, then great. If not, here is my step by step pictorial guide on how you set up your link. It is quite easy and it does work really well.
I am going to use my DJI Phantom interface to demonstrate the process as DJI are 70% of the market and you are more than likely to own one of their products.
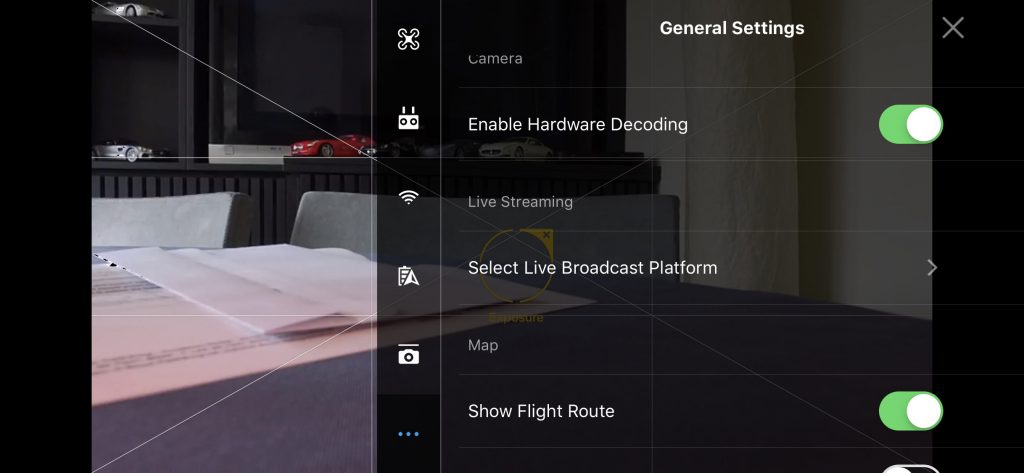
Set up your drone outside where it is safe, you have the necessary permissions, you are observing CAA flight rules, and your drone is live and ready to fly. Do not start your rotors yet. You will see there are three little dots in the top right corner of the screen. Click on them.

Then tap Select Live Broadcast Platform.
This will take you to another page where you can select the destination for your live video link. The choice includes a Facebook or YouTube page. You will need to log in to connect to either. So they will need to be either your own pages or one which you have the log in details for.
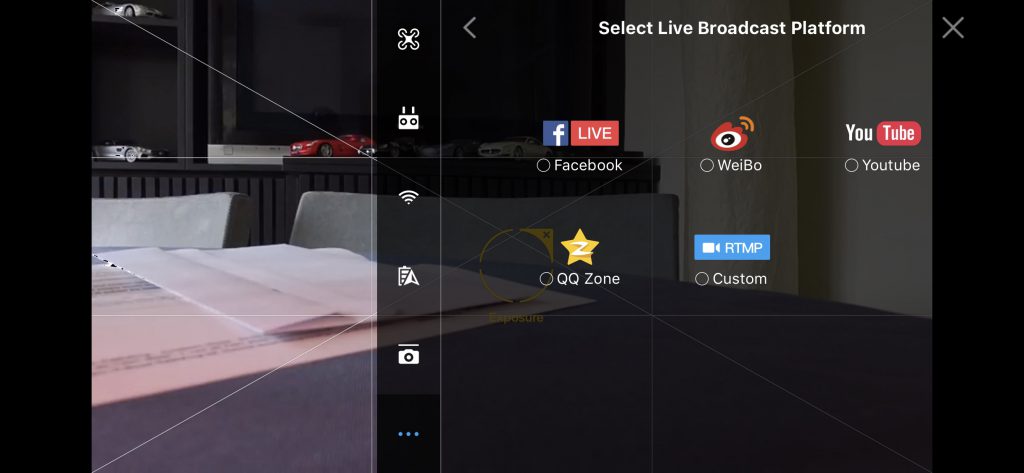
This page includes an RMTP link. This is the best way to do it as you can connect in to a live feed using a vision mixing desk. So your feed will be like the helicopter pictures in a Formula 1 broadcast where the vision mixer receiving your video link will cut in and out of it. Facebook or youtube will be stand alone unless the link you use can be incorporated into a mix.
If you select, say, youtube the next screen will look like this.
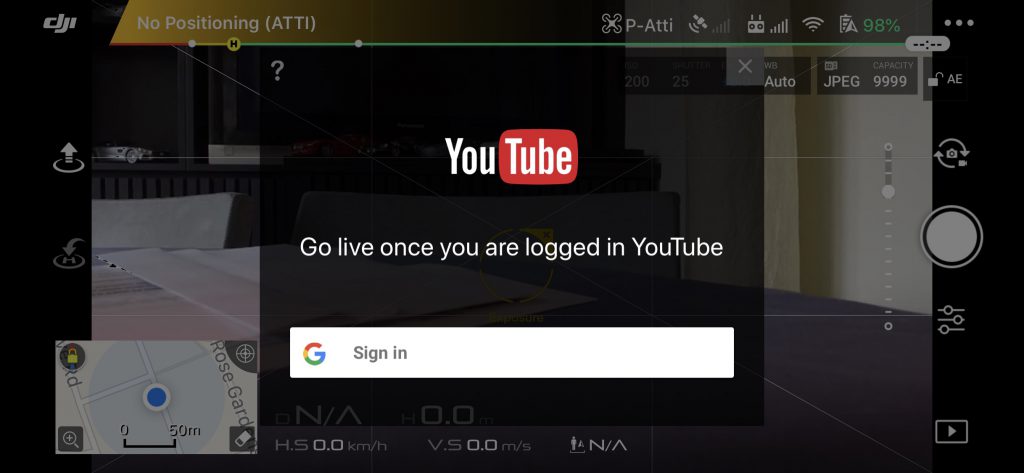
Sign in to YouTube using your account or one you have been assigned. I would advise you to obtain the details before you are on site so you can establish if it works ok with your client.
Next you will see the log in and below it there will be a red bar like this which says ‘go live’. Tap the red bar and in a few seconds you will be taken to another screen.
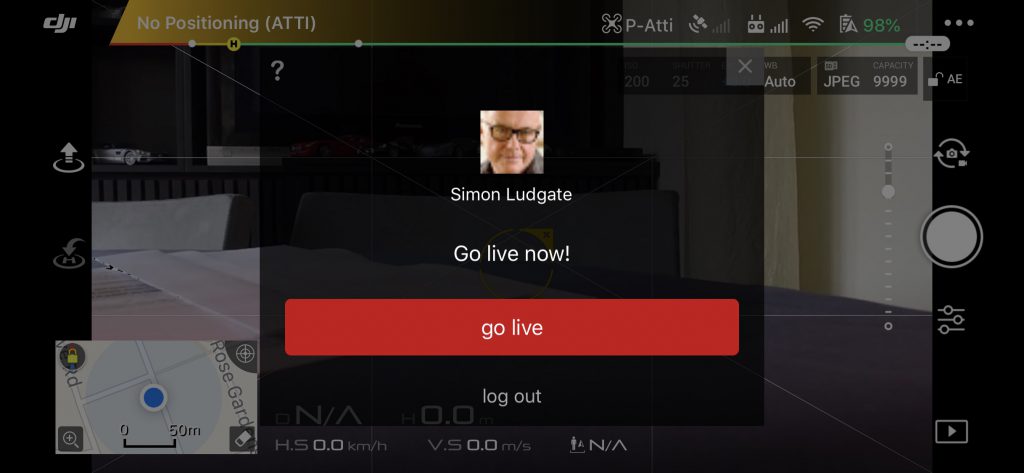
Now there will be an opportunity name your feed and add a description. Fill this in and then tap the ‘go live’ red bar again. Don’t forget to set your privacy options to Public on whichever account you are using or it will not be available publicly.
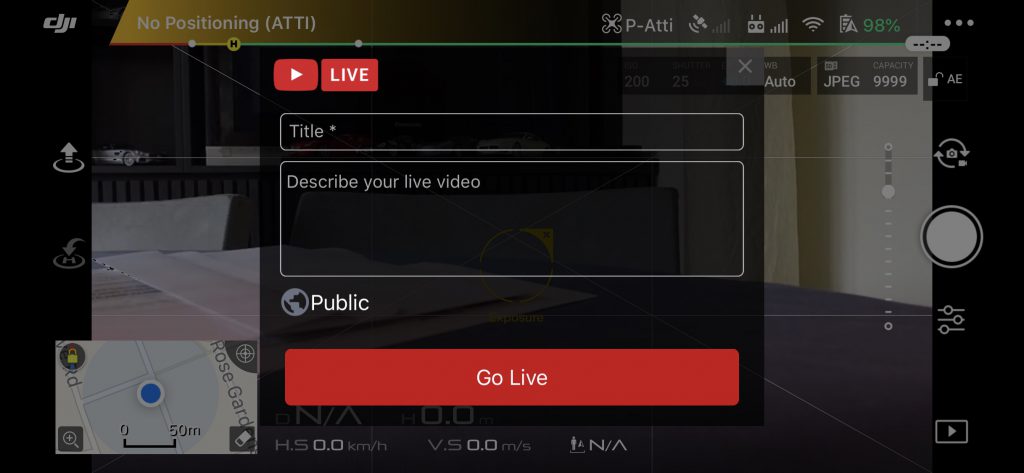
Tap outside the central block on the background and this will minimise the information block you have been filling in. You will see a confirmation of your live link and an elapsed time running in the top left corner of your screen.
You are now broadcasting live to your designated destination so off you go. If it is your Facebook page for instance, the pictures will be live and the entire sequence you film before you disconnect will be saved on your page. So if you no longer need it there, delete it on Facebook.
You can disconnect the feed by tapping on the elapsed time icon again in the top left hand corner of your screen. You have the option to record live sound too from your phone, tablet or screen (if it has a built-in condenser mic) and it is quite good. So you can provide your own live commentary or chat to someone else standing next to you. But if you are cursing or you say anything inappropriate, it is clearly audible. Also bear in mind if your drone is close by there will be a lot of rotor noise.
I would recommend you practice flying the extent of the required range to make sure you aren’t going to lose your picture link before you go ‘live’. If you can’t see the picture on your screen, the link won’t be working either as it uses your controller to transmit the image. Here’s a basic practice example of mine including picture dropout. Click here.
The more central to an urban area or CTZ you are where there are lots of electro magnetic fields the more often and more likely you are to lose signal. The more remote and flat the area, the better the signal.
The live link appears to use very little if any extra power over and above the expected battery discharge so doesn’t impact on your flying time.
If you are covering a series of short events during a day, start going through the initialisation sequence I’ve described above a couple of minutes before you are needed because it takes a while.
You’ll learn how long you personally need when you try it. You have to start from scratch each time after you stop transmitting.
And you will need to be on the ground to do it!